How to Add a Conda Environment to Jupyter Notebook
Typical python projects use multiple packages for various tasks and some of the packages are shared between projects. However, sharing same packages between projects can cause problems. A virtual environment is a way to have multiple, parallel instances of the Python interpreter, each with different package sets and different configurations, avoiding the problems caused by sharing.
Some of the popular virtual environment implementations for Python are:
- Virtualenv
- Conda
- pipenv
- venv
In this article, we will show you how to add a Conda virtual environment to your Jupyter Notebook.
1 Create a new terminal
Log in to your Jupyter Notebook and create a new terminal by navigating to New > Terminal.

2 Create Conda virtual environment to the persistent directory (/cloudclusters)
Input "bash" in the terminal to enter the default virtual environment (base)

Create a virtual environment into a persistent directory (/cloudclusters) by using the following command,
# conda create -p /cloudclusters/<virtual-environment-name> python=<python-version> -y
‘-p’ specifies the virtualization directory. and you can also specify a different version of Python. For example:
# conda create -p /cloudclusters/new-venv python=3.8 -y

3 View installation results
Using the ls and du -sh command to check if the virtual environment has been installed.

4 Activate the virtual environment
Using the command below to activate the newly-created virtual environment.
# conda activate /cloudclusters/new-venv/

5 Install the IPython kernel
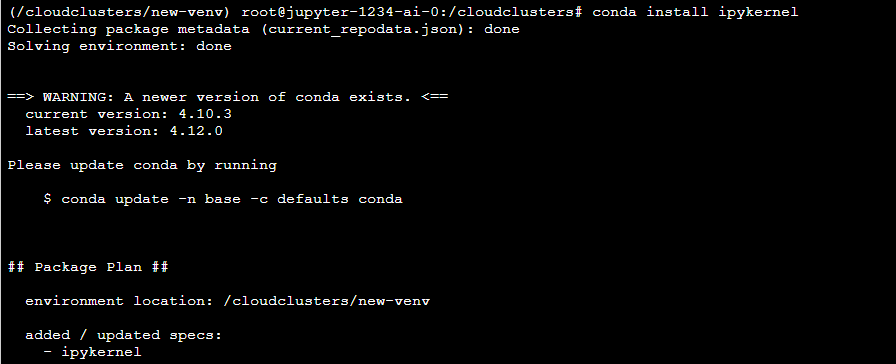
The IPython kernel is the Python execution backend for Jupyter Notebook. Install it in the newly-created virtual environment via the command below:
# conda install ipykernel -y

6 Add your virtual environment to Jupyter
Using virtualenv or conda envs, you can make your IPython kernel in one env available to Jupyter in a different env. To do so, run ipykernel install from the kernel’s env, with –prefix pointing to the Jupyter env:
# python -m ipykernel install --prefix=/cloudclusters/Anaconda3/ --name "python-new-venv"

7 Check the Kernel list
Deactivate the virtual environment and view the kernel list by issuing the commands.
# conda deactivate
# jupyter kernelspec list

8 verify successful operation
Refresh the interface, you can see that the kernel named python-new-venv has been added to the notebook.

9 Install packages
Install the packages you need, such as PyTorch, via the following command.
# pip install torch torchvision
10 Verify successul installation
Verify if the package is available.
